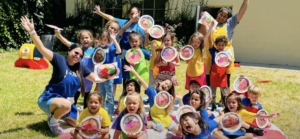

Make this paper craft of faces that express joy, surprise, sadness and more – it’s a perfect activity to help kids understand and express their emotions in a creative way!
Click the Image below to follow along with the video:
You will need:
| In English | En Español |
| 🌟4 Papers – Color Yellow
🌟1 Paper – Color Black. 🌟1 Paper – Color White 🌟1 Large Popsicle stick 🌟 Black marker 🌟 Red marker 🌟 1 Pencil 🌟 Scissors (This item must be used in the company of an adult). 🌟 Glue |
🌟4 Hojas color amarillo
🌟1 Hoja color negro 🌟1 Hoja color blanco 🌟1 Palo de paleta grande 🌟 Plumón color negro 🌟 Plumón color rojo 🌟 Lápiz 🌟 Tijeras (Este elemento debe ser usado en compañía de un adulto). 🌟 Pegamento |
Instructions:
English:
- Use a circular object (like a bowl) to trace a circle in the black paper. Cut out the circle (an adult must supervise the use of scissors).
- Draw a small oval on the white piece of paper. This will be part of the eye, so the oval should fit nicely in the size of the circle you cut out in step 1. Cut out the oval. Trace out 7 more ovals with the one you cut out and cut these 7 ovals out. Set the ‘eyes’ aside.
- Use the circular object you used in step 1 to trace out a circle on the yellow paper. Trace one circle on each of the 4 yellow papers and cut each of these circles out. These will be the ‘faces’ to draw emotions on.
- Color black ‘pupils’ on the white ovals you cut out in step 2. Observe the video at 1 minute for a reference.
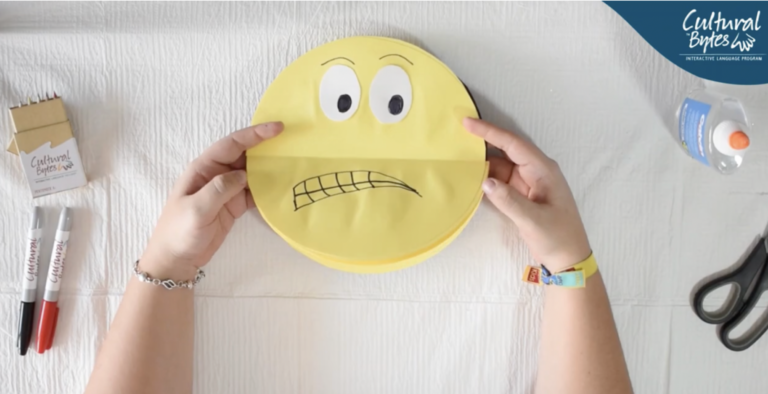
- Fold each of the yellow circles in half.
- Glue two eyes on the upper half of the circles you just folded.
- Draw details on each of the faces to express 4 different emotions. For example, a happy face, an angry face, a sad face, and a surprised face.
- Glue the bottom, back of one face to the bottom, top of the other face so that they fold down upon each other as you flip through them.
- Glue the black circle on the back of the faces.
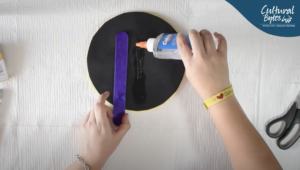
- Glue the popsicle stick to the back of the black circle. This will be the handle.
- Let the glue dry and enjoy your craft! Perform a play to act out different emotions or think of a story of when you felt each emotion.
Español
- Utilice un objeto circular (como un cuenco) para trazar un círculo en el papel negro. Recorta el círculo (un adulto debe supervisar el uso de las tijeras).
- Dibuja un pequeño óvalo en la hoja de papel blanca. Esto será parte del ojo, por lo que el óvalo debe encajar bien en el tamaño del círculo que cortaste en el paso 1. Recorta el óvalo. Traza 7 óvalos más con el que recortaste y recorta estos 7 óvalos. Deja los “ojos” a un lado.
- Usa el objeto circular que usaste en el paso 1 para trazar un círculo en el papel amarillo. Traza un círculo en cada uno de los 4 papeles amarillos y recorta cada uno de estos círculos. Estas serán las “caras” en las que dibujar emociones.
- Colorea las “pupilas” negras en los óvalos blancos que recortaste en el paso 2. Observa el video al minuto 1 como referencia.
- Dobla cada uno de los círculos amarillos por la mitad.
- Pega dos ojos en la mitad superior de los círculos que acabas de doblar.
- Dibuja detalles en cada una de las caras para expresar 4 emociones diferentes. Por ejemplo, una cara feliz, una cara enojada, una cara triste y una cara de sorpresa.
- Pegue la parte inferior y posterior de una cara a la parte inferior y superior de la otra cara para que se doblen entre sí a medida que las hojea.
- Pega el círculo negro en la parte posterior de las caras.
- Pega el palito de paleta a la parte posterior del círculo negro. Este será el mango.
- ¡Deja que el pegamento se seque y disfruta de tu manualidad! Realice una obra de teatro para representar diferentes emociones o piense en una historia de cuándo sintió cada emoción.
If you enjoyed this craft, check out ViLaCa (Virtual Language Craft) where students learn about culture, play games, and do crafts every single week, all while practicing their Spanish!